Introduction
OMR (wiki) are answer sheets that are not intended to be read by a human being. This projects eliminates the need to buy OMR reading machines and even a photo scanner for computer. Any >3MP mobile phone camera with autofocus will do the job.
You are three steps aways from integrating OMR sheet recognition capability to very own .Net Application.
1: Download and glean into source code with your favourite Visual Studio 2010 and above.
2: Read and understand this article
3: Use your "common sense" to get things going further
Background
This article discusses the 2nd version of OMR engine I wrote in 2012. It is highly recomended for the readers to experience the first version of engine first which is located at: C# - Optical Marks Recognition (OMR) Engine 1.0
This project started as a fun but grabbed my time as soon as I started to imagine the possibilities. Including me, many people have brought this project into commercial usage as well as research purpose at university projects.
Some the people would ask, "Why re invent the wheel?" because there are numerous OMR engines and even embedded systems available in market. But this project is open source and written in high level language. So, integration with other .Net application is not an issue. This is the main reason I've been devoting time since it started.
Whats new?
V2 is equipped with many tweaks, updates, additions and removals. Unfortunately, it removes altogether, the backwards compatibility of OMR sheets.
- Image detection, analysis is now more precise, much reliable and faster.
- Added a whole class to manage OMR sheet in more like Object-oriented approach.
- Image color correction method changed from hit-and-trial to absolute.
- Ability to process images in async threads.
- XML sheet storage changed to access 2007 database
- added OMR.helpers.dbOps class for managing all database operations in one place
- Improved image detection algorithm to consume less memory
- Paramter based output quality and performance adjustment
- I nice GUI to create your own OMR sheets.
[FAQ] Terms used and basic concepts
This section contains answers to mostly aasked questions. I recomend everyone to read this section before proceding any step further.
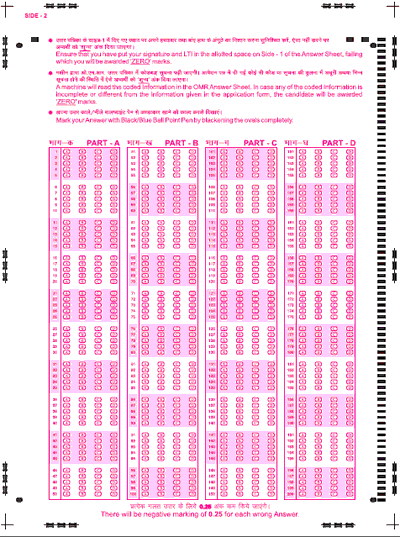
Most of us know that OMR sheets look like this:

The black markings on this sheet are used for page deection.
However, this engine DOES NOT use such sheets. Sheets used in this engine look like:


Source images taken from camera may look as rough as:

The four square blocks on the corners are used to extract OMR sheet from a camera image.
Sheet definitions are saved in an Access Database for portability. Structure of this database is very simple and self explanatory. However, you don't need to understand it unless you want to make some concept level changes in the engine.
Creating an OMR Sheet
You don't need to know how to create these sheets because there is a class in the solution named, "OMR.forms.answerKeyDesigner". The form looks like this:

This is the simple most GUI to create OMR sheets of your own choice. For this understand these terms:
- RegistrationBlock: Can be used to take regitration or roll number of students as well as randomization code of answer sheet. This block can placed any where on the invisible grid. Number of digits can be changed. Just hiver over the lower border of a block. Visual style of these blocks can also be changed.
- AnswerBlock: Can be used to take answers of Multiplechoice questions (MCQ) or True/False statements. Handeling is similar to Rigistration block. Visual style of these blocks can also be changed.
- EmptyBlock: Some institutes use hand signatures/hand writting marks as record keeping practice and other reasons. This block can be used to identify any empty region on sheet which requires such input.
One of the most practical features is the background image. You can use any PDF file to make the background of the sheet. This feature can be used typically to add customized text and graphics on the sheet which might and might not be a part of OMR results. Just see above in the sample image for an idea.
Once you are done with the editing, select a sheet name. And save the database. This will generate three files. One Database,, one high resolution resterized image and one PDF printable file. Unfortunately, I have forgot to move the printables to output directory selected, they are copied in project directory. Kindly don't take it hard.
These points will certainly lead to errors/failures:
This name MUST NOT CONTAIN spaces and special characters.
No comments:
Post a Comment