Thursday, November 15, 2012

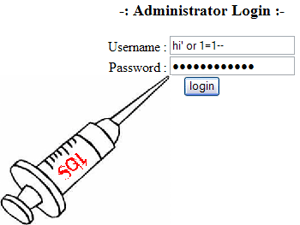
The Best Way to Prevent SQL Injection

If you use a framework of some sort, you probably haven't thought about SQL injection for some time – in fact it almost seems dated to even discuss it.  However, security should never be overlooked and it's important to not trust third party applications and people by default!  So what is the best way to prevent SQL injection?

Have you noticed how I haven't specified a specific language?  This is done purposely, because at the end of the day – all languages – should be able to follow this paradigm…
<!--more-->
<script type="text/javascript"><!-- google_ad_client = "ca-pub-5871284963570559"; /* endyourif - content */ google_ad_slot = "3358884038"; google_ad_width = 336; google_ad_height = 280; //--> </script> <script type="text/javascript" src="http://pagead2.googlesyndication.com/pagead/show_ads.js"> </script>

 When dealing with data either through the URL or via a user submitted form, the best way to prevent SQLinjection is to investigate prepared SQL statements OR parameterized queries in whatever language you are using. 

Monday, January 30, 2012

How to use Dracula Graph Library from .NET

Create the following classes in your project
 
 using System;  
 using System.Collections.Generic;  
 using System.Linq;  
 using System.Web;  
 /// <summary>  
 /// Summary description for WGData  
 /// </summary>  
 public class WGData  
 {  
   //This class takes set of sentences and then convert them into  
   //Nodes and edges  
      public struct Data{  
         public string id;  
       }  
      public struct DataEdges  
      {  
        public string id;  
        public Int64 weight;  
        public string source;  
        public string target;  
      }  
      public struct Nodes  
      {  
        public Data data;  
      }  
      public struct Edges  
      {  
        public DataEdges data;  
      }  
      public List<Nodes> nodes;  
      public List<Edges> edges;  
   public WGData(Dictionary<string, GraphEdge> sentenceData, List<string> AllWords)  
      {  
     int length = AllWords.Count;  
     nodes = new List<Nodes>();  
     edges = new List<Edges>();  
     foreach (string word in AllWords)  
     {  
       Nodes nd = new Nodes();  
       nd.data.id = word;  
       nodes.Add(nd);  
     }  
     foreach (string sentence in sentenceData.Keys)  
     {  
       string[] Words = sentence.Split(" ");  
       Edges ed = new Edges();  
       ed.data.id = Words[0] + Words[1];  
       ed.data.weight = sentenceData[Words[0] + " " + Words[1]].LinkWeight;  
       ed.data.source = Words[0];  
       ed.data.target = Words[1];  
       edges.Add(ed);  
     }  
      }  
 }  

 using System;  
 using System.Collections.Generic;  
 using System.Web;  
 using System.Web.UI;  
 /// <summary>  
 /// Summary description for WeightedGraph  
 /// </summary>  
 public class WeightedGraph  
 {  
   
   private string[] myWords;  
   private Dictionary<string,GraphEdge> sentenceData;  
   private object locker;  
      public WeightedGraph()  
      {  
     sentenceData = new Dictionary<string, GraphEdge>();  
     locker = new object();  
      }  
   public void BuildData(string[] Words)  
   {  
     myWords = Words;  
     try  
     {  
       if (myWords.Length > 1) //This mean two words at least  
       {  
         for (int i = 0; i < myWords.Length - 1; i++)  
         {  
           GraphEdge gBond = new GraphEdge();  
           gBond.FirstNode = myWords[i];  
           gBond.SecondNode = myWords[i + 1];  
           string sentence = myWords[i] + " " + myWords[i + 1];  
           lock (locker)  
           {  
             if (!sentenceData.ContainsKey(sentence))  
             {  
               sentenceData.Add(sentence, gBond);  
             }  
           }  
         }  
       }  
     }  
     catch (Exception ex)  
     {  
       throw new Exception("Error while constructing WeightedGraph data : " + ex.Message);  
     }  
   }  
   public Dictionary<string, GraphEdge> GraphData()  
   {  
     if(sentenceData.Count > 0)  
     {  
       return sentenceData;  
     }  
     else  
     {  
       return null;  
     }  
   }  
 }  

 using System;  
 using System.Collections.Generic;  
 using System.Linq;  
 using System.Web;  
 /// <summary>  
 /// Summary description for GraphBond  
 /// </summary>  
 public class GraphEdge  
 {  
   //This class represent and edge between two nodes in the graph  
   //The weight also defined here  
   //And the names of the two nodes in the edge  
   public string FirstNode = null;  
   public string SecondNode = null;  
   public Int64 LinkWeight = 0;  
 }  
 using System;  
 using System.Collections.Generic;  
 using System.IO;  
 using System.Linq;  
 using System.Web;  
 /// <summary>  
 /// Summary description for BuildWeightedGraphJSCode  
 /// </summary>  
 public class BuildWeightedGraphJSCode  
 {  
   //This class takes the input nodes and the edges of all sentences  
   //And try to form the fourmla of dracula library by constructing the javascript code  
   //To add the nodes and the edges to the graph  
   //The code is divided into 3 files header , and the string contains the edges nodes created by this calls and the footer  
   //Then merge all the files togther into one string contains all the dracula fourmla of JavaScript code  
   //The returned code used to draw the graph  
   private string mSentence = null;  
   private string mJavaScriptCode =null;  
   public string JavaScriptCode { get { GetJSCode(); return mJavaScriptCode; } }  
   public WGData wgData;  
      public BuildWeightedGraphJSCode(List<string> sentences)  
      {  
     List<string> Words = new List<string>();  
     WeightedGraph wg = new WeightedGraph();  
     foreach (string sentenec in sentences)  
     {  
       mSentence = sentenec;  
       string [] WordOfThisSentence = mSentence.Split(" ");  
       foreach (string word in WordOfThisSentence)  
       {  
         if(Words.Contains(word) == false)  
         {  
           Words.Add(word);  
         }  
       }  
       wg.BuildData(WordOfThisSentence);  
       wgData = new WGData(wg.GraphData(), Words);  
     }  
      }  
   private void GetJSCode()  
   {  
     /*string json = JsonConvert.SerializeObject(wgData);  
     ScriptManager.RegisterStartupScript(this, typeof(Page), "drawWG", " DrawWeightedGraph(" + json + ",true , " +"'"+ Words [0]+"'"+ ");", true);  
     */  
     StreamReader sr = new StreamReader(HttpRuntime.AppDomainAppPath + @"\bin\graphhead.txt");  
     string header = sr.ReadToEnd();  
     sr.Close();  
     //sr = new StreamReader(appPath + @"\bin\graphmed.txt");  
     //string med = sr.ReadToEnd();  
     string allNodes = null;  
     foreach (WGData.Nodes nd in wgData.nodes)  
     {  
       string nodeString = "g.addNode('" + nd.data.id + "', {render:render});";  
       allNodes = allNodes + nodeString + "\n";  
     }  
     string allEdges = null;  
     foreach (WGData.Edges edg in wgData.edges)  
     {  
       if (edg.data.source != "" & edg.data.target != "" && edg.data.source != null & edg.data.target != null)  
       {  
         string edgeString = "g.addEdge('" + edg.data.source + "','" + edg.data.target + "', {weight:9, directed: true, fill : '#56f', stroke : '#bfa' , label : '" + edg.data.weight + "'});";  
         allEdges = allEdges + edgeString + "\n";  
       }  
     }  
     string med = allNodes + allEdges;  
     sr = new StreamReader(HttpRuntime.AppDomainAppPath + @"\bin\graphtail.txt");  
     string tail = sr.ReadToEnd();  
     mJavaScriptCode = header + med + tail;  
   }  
 }  
Then to use the library you have to refrence dracula library JavaScript files in your page , Download link : http://www.graphdracula.net/showcase/ Finally add the following code to your .CS file, You may change the weight on the connections between the nodes , Default value is 0
             BuildWeightedGraphJSCode buildJavaScriptCode = new BuildWeightedGraphJSCode(Sentences);  
             for (int i = 0; i < buildJavaScriptCode.wgData.edges.Count; i++)  
             {  
               WGData.Edges edg = buildJavaScriptCode.wgData.edges[i];  
               edg.data.weight = 0;  
               buildJavaScriptCode.wgData.edges[i] = edg;  
             }  
             ScriptManager.RegisterStartupScript(this, typeof(Page), "drawWG", buildJavaScriptCode.JavaScriptCode, true);  
The above code will draw the graph on the default div called "canvas"
 var redraw;  
 function CreateGraph(){  
   var width = $(parent).width() - 300;  
   var height = $(parent).height() - 300;  
   /* Showcase of the Bellman-Ford search algorithm finding shortest paths   
     from one point to every node */  
   /* */  
   /* We need to write a new node renderer function to display the computed  
     distance.  
     (the Raphael graph drawing implementation of Dracula can draw this shape,  
     please consult the RaphaelJS reference for details http://raphaeljs.com/) */  
   var render = function(r, n) {  
       /* the Raphael set is obligatory, containing all you want to display */  
       var set = r.set().push(  
         /* custom objects go here */  
         r.rect(n.point[0]-30, n.point[1]-13, 60, 44).attr({"fill": "#feb", r : "12px", "stroke-width" : n.distance == 0 ? "3px" : "1px" })).push(  
         r.text(n.point[0], n.point[1] + 10, (n.label || n.id) + "\n" + (n.distance == undefined ? "" : n.distance) + ""));  
       return set;  
     };  
   var g = new Graph();  
   /* modify the edge creation to attach random weights */  
   g.edgeFactory.build = function(source, target) {  
      var e = jQuery.extend(true, {}, this.template);  
      e.source = source;  
      e.target = target;  
      e.style.label = e.weight = Math.floor(Math.random() * 10) + 1;  
      return e;  
   }  
Create file called graphead.txt and insert into bin folder using the above code
  /* random edge weights (our undirected graph is modelled as a bidirectional graph) */  
 /*  for(e in g.edges)  
     if(g.edges[e].backedge != undefined) {  
       g.edges[e].weight = Math.floor(Math.random()*10) + 1;  
       g.edges[e].backedge.weight = g.edges[e].weight;  
     }  
 */  
   /* layout the graph using the Spring layout implementation */  
   var layouter = new Graph.Layout.Spring(g);  
   /* draw the graph using the RaphaelJS draw implementation */  
   /* calculating the shortest paths via Bellman Ford */  
 //  bellman_ford(g, g.nodes["Berlin"]);  
   /* calculating the shortest paths via Dijkstra */  
   //dijkstra(g, g.nodes["Berlin"]);  
   /* calculating the shortest paths via Floyd-Warshall */  
   //floyd_warshall(g, g.nodes["Berlin"]);  
   /* colourising the shortest paths and setting labels */  
   for(e in g.edges) {  
     if(g.edges[e].target.predecessor === g.edges[e].source || g.edges[e].source.predecessor === g.edges[e].target) {  
       g.edges[e].style.stroke = "#bfa";  
       g.edges[e].style.fill = "#56f";  
     } else {  
       g.edges[e].style.stroke = "#aaa";  
     }  
   }  
   var renderer = new Graph.Renderer.Raphael('canvas', g, width, height);  
   redraw = function() {  
     layouter.layout();  
     renderer.draw();  
   };  
 /*  var pos=0;  
   step = function(dir) {  
     pos+=dir;  
     var renderer = new Graph.Renderer.Raphael('canvas', g.snapshots[pos], width, height);  
     renderer.draw();  
   };*/  
      };  
 $(document).ready(function(){  
      //CreateGraph();  
 });  
 $("#canvas").html("");  
 CreateGraph();  
 StylingGraph();  
and ceate another file called graphtail.txt and insert the above code in it , the file must be placed in the bin folder

Tuesday, September 20, 2011

Creating Your First EMGU Image Processing Project

Introduction 

The following article is designed to show new comers to EMGUcv how to set up a project step by step. This information is freely available here however, this article is designed to make the process a little more user friendly. EMGU is a c# wrapper for OpenCV it differs from other wrappers as it written purely in c# and does not use unsafe code. EMGU opens the OpenCV (Open Source Computer Vision Library) library of programming functions mainly aimed at real time computer vision to C# developers. OpenCV was originally developed by Intel and now supported by Willow Garage.     
Current versions for both x86 and x64 architectures are available to download at their Sourceforge website.    
As EMGU is a wrapper for c++ code there are two types of Dynamic-link library’s (DLL’s) that are used. There are the EMGU ones with EMGU syntax always reference in the name and the opencv ones that vary. Setting up a first project is a common stumbling block for many newcomers and you are not alone.  
If you have downloaded the source code you will need to read “A Basic Program”. If you have copied an example from the EMGU extraction folder then take a look at The EMGU.CV.Invoke Exception and Troubleshooting section. 

Assumed Knowledge

It is assumed that a user has basic experience in c# and can generate a new c# project. It is assumed that each user has download the most recent update for their platform and has the HelloWorld Example running from the EMGU extraction folder\EMGU.Examples\Hello World.

The Basic Requirements   

As with any c# library there are some essential DLL’s that need referencing within your project. Start a new c# Windows Form Application and call it what you like. All DLL mentioned are in the EMGU extraction Folder\bin you will need to remember this. To start with you need to reference 3 EMGU DLL’s. 
  • Emgu.CV.dll
  • Emgu.CV.UI.dll 
  • Emgu.Util.dll  
This is done by either right clicking on your project name or the References folder within the solution explorer. Go to Add Reference.
IMG1.jpg 

Or alternatively using the menu item Project > Add Reference. When the Add Reference window opens select the DLL’s listed above and click OK.

IMG2.jpg

You will now see them listed in the References folder in the solution explorer window. These three DLL’s are the EMGU specific c# libraries mentioned previously. These alone will not allow you to use any of the image processing functions so please read the rest of the article.
Now you need to reference these in any class of form that you will be using the code. The references you will use will depend on what you are doing in image processing terms. Look at the examples and these will have the ones your require. To get you started add the following to the top of the Form1.cs code behind.  
    using Emgu.CV;
    using Emgu.Util;
    using Emgu.CV.Structure;


The Preferred Method 

Now for the more complicated c++ libraries, to load, display, access image data and do many of the more simpler functions you only need two files.  Note that the "220" is the version number this will change according to updates (opencv_core***.dll, opencv_imgproc***.dll).
  • opencv_core220.dll    
  • opencv_imgproc220.dll
Now because these are wrapped c++ files you can’t reference them like you did with the EMGU files. You need to add these files to your project. This can be done in two ways, Right click on your project name within solution explorer (This is not the one starting with “Solution ‘Your Project Name’ ...” but the one bellow this). Go to Add > Existing Item using the standard open file dialog. Select the two files above, in case you forgot they are located in the EMGU extraction Folder\bin.

Hint: if you can’t see .dll's make sure you change the file filter at the bottom right to Executable Files.

IMG3.jpg

You will now be able to see your files within the solution explorer window. You will need to change there properties so select them both by holding down the Ctl key and left clicking on them (alternatively you can do this individually). Now look at Properties window, you will see 6 fields two of these will be filled with content. You are interested in the Copy to Output Directory. Change this from “Do not Copy” to “Copy always”.
IMG4.jpg
If you are using the x64 compilations go to the x64 section and ensure you set up you project to compile to a x64 architecture other than that you are ready to start image processing. The reason this is the preferred method is that now, if you change from Debug to Release these files will always be available to your program and no errors will occur. Jump to the reading and displaying an image section A Basic Program to start you off.  
   

The Less Preferred Method

While not proffered this is often the simplest and if you have a complex project architecture this can prevent the solution explorer from looking very messy. Simply navigate in windows explorer to the EMGU extraction folder\bin copy the relevant dll files opencv_core220.dll and opencv_imgproc220.dll to your project bin\Debug folder or to bin\Release folder. This will change with x64 versions as it will be the bin\x64\Debug folder or alternative Release folder.
While the benefits are not so clear here, imagine if you require all the opencv DLL files then you will have an extra 34 files within the solution explorer however, it is rare this will be the case.

x64 Architecture and the EMGU.CV.Invoke Exception

If you are running an x64 system or designing for them you will have to download separate DLL’s. The steps on forming a project are identical however you will need to change an additional build parameter. Right click on your project file in the solution explorer and select “Properties” at the bottom. Select the “Build” tab from the ribbon bar on the right of this window. There will be an option for Platform Target: with a drop down menu change this from x86 to x64. 

IMG5.jpg

Hint: If you are using the express version of visual studio you may not see the x64 option in such a case go to menu option Tools > Options. In this window using the arrows to the left hand side to expand and collapse options. Select “Projects and Solutions” and select the Show advanced build configurations check box.

IMG6.jpg

This will now allow the compilation to run if this is not done correctly. As soon as you access any EMGU code an exception will be thrown ‘EMGU.CV.Invoke’ through an exception with the ‘InnerException’ "An attempt was made to load a program with an incorrect format....”. 

A Basic Program

To get you started a simple program that loads an image and displays it in a picture box has been provided and a little bit more of an advanced one that will show how to access image data and convert between image types.
Only x64 Versions are currently available, x86 will be provided shortly.
If you have downloaded the sample code you will start with 3 warnings for the references not being found. Expand the References folder within the solution explorer delete the 3 with yellow warning icons and Add fresh references to them, the steps of which are available The Basic Requirements section.
There has been a button item and a picturebox item added to the main form. There default names have not been changed. When we click on the button we wish to open a file dialog select and image and have it displayed in the picturebox.

Double click on the button and add the following code:
    
    private void button1_Click(object sender, EventArgs e)
    {
        OpenFileDialog Openfile = new OpenFileDialog();
        if (Openfile.ShowDialog() == DialogResult.OK)
        {
            Image<Bgr, Byte> My_Image = new Image<Bgr, byte>(Openfile.FileName);
            pictureBox1.Image = My_Image.ToBitmap();
        }
    }
  

The code is very simple an OpenFileDialog called 'Openfile' is used to select and image file. This image is then read into an colour Image object called 'My_Image'. The image is displayed by assigning the Image property of the picturebox. This requires a Bitmap and by calling the .ToBitmap() function of 'My_Image' this is achieved.
This is incredibly simple to achieve once the correct process has been taken in setting up the project.  An alternative to the Picturbox item is made available through the EMGU.CV.UI library and is used in the examples. Please visit http://www.emgu.com/wiki/index.php/Add_ImageBox_Control to learn how to add this control to visual studio should you wish to use it.

A Little More Image Processing

The slightly more advanced source code project will have the same warnings as described in A Basic Program has been provided. The references will need replacing. In this program there is a demonstration of converting anImage from colour to greyscale and accessing the Data of individual pixels. While the methods of suppressing the image spectrum data is not the most efficient it is a good example on accessing the image Dataproperty.

A little on Converting Images  

Image conversion in EMGU can be complex. In the example program a Bgr colour image is converted the Grayor grayscale.  
    Image<gray,byte> gray_image = My_Image.Convert<gray,byte>();
However you will eventually want to use a different depth (Tdepth) of image rather than Byte. The problem with this method is you can only convert a depth or colour once per call. Lets say we wish to convert from Image<bgr,byte> to Image<gray,double> you would have to use the following syntax.
    Image<Gray,byte> gray_image = My_Image.Convert<Gray,byte>();
    Image<Gray,double> gray_image = My_Image.Convert<Gray,double>();
    //or alternatively in one line
    Image<Gray,> gray_image = My_Image.Convert<Gray,byte>().Convert<Gray,double>();
    //alternatively
    Image<Gray,Byte> gray_image = My_Image.Convert<Bgr,double>().Convert<Gray,double>();

Accesing Image Data  

There are a few ways of accessing image data and assigning values to it. There are two methods available, direct access using the Image Data property of a more remote access. Both are demonstrated here. Note it is important to respect the image spectrum depth when accessing the Data property. A grayscale image will have a depth of one so will be reference as [x,y,0] however a colour image as a depth of 3, [x,y,0], [x,y,1] & [x,y,2] representing the Blue, Green & Red spectrums respectively (Bgr).
Lets say we wish to assign a value to a pixel at position [0,0] a value. Using the easier remote method we can use:
//Colour Image
My_Image[0, 0] = new Bgr(Color.Red);

//Gray Image
gray_image[0, 0] = new Gray(200);
Or we use the Data property 
//Colour Image
Color R = Color.Red;
My_Image.Data[0,0,2] = R.R; //Write to the Red Spectrum
My_Image.Data[0,0,1] = R.G; //Write to the Green Spectrum
My_Image.Data[0,0,0] = R.B; //Write to the Blue Spectrum

//Gray Image
gray_image[0, 0] = new Gray(200);

So writing to a pixel is fairly simple but what about reading a pixel value.
//Colour Image
Bgr my_Bgr = My_Image[0, 0];

//Gray Image
Gray my_Gray = gray_image[0, 0];
 
Now in many cases you will not want to work with “Bgr” or “Gray” so converting them is important. 
//BGR to Color
Color my_colour = Color.FromArgb((int)value.Red, (int)value.Blue, (int)value.Green);

//Gray to int
int my_intensity = (int) my_Gray.Intensity;

You will notice that each value is cast to an integer to allow data loss this is because the intensities are stored naturally as doubles. However in this case the easier method is accessing the Image Data property. If you wish to work with the image data there is not a requirement to constantly convert between Gray and integers etc. You can access the image Data directly and use that.   
//Colour
Color my_colour = Color.FromArgb(My_Image.Data[0, 0, 0], 
My_Image.Data[0, 0, 1], My_Image.Data[0, 0, 2]);

//Gray Image
int my_intensity = gray_image.Data[0, 0, 0];

Much simpler and far easier to work with when processing the image Data within a loop. To examine how to implement a loop please download the Little More Image Processing source code.  


Tuesday, August 23, 2011

Whitepages.com C# API Wrapper

Project Description
A simple wrapper and test client for the WhitePages.com API.

Sample useage:

First you need to set the API Key:

Whitepages.API.APIKey = "MY API KEY FROM WHITEPAGES.COM";

Then call the methods:


Whitepages.wp business = null;
if (Whitepages.API.FindBusiness("Microsoft Corporation", "Redmond", "WA", out business))
{

}

or

Whitepages.wp result = null;
if (Whitepages.API.FindPerson("William Gates", "WA", out result))
{
Whitepages.wp address = null;
if (result.listings != null && result.listings.Length > 0)
{
Whitepages.address addy = result.listings[0].address;
Whitepages.API.ReverseAddress(addy.house, addy.street, addy.city, addy.state, out address);


Whitepages.phone phone = null;
foreach (Whitepages.listing lst in result.listings)
{
if (lst.phonenumbers != null && lst.phonenumbers.Length > 0)
phone = lst.phonenumbers[0];
}
if (phone != null)
{
Whitepages.wp phoneResult = null;
Whitepages.API.ReversePhone(phone.fullphone, out phoneResult);
}
}

}

Full source including the above example in the "Source Code" repository. Releases only includes the "WhitepagesAPI" DLL for inclusion in your projects.

It should also work in your Windows Mobile Applications, just compile the WhitepagesAPI DLL as a Mobile Library.


original article on codeplex.com

Monday, August 30, 2010

Whitepages API Initial Release

This includes the initial release of the API Wrapper DLL.

click on this link : https://whitepages.codeplex.com/releases/view/21603